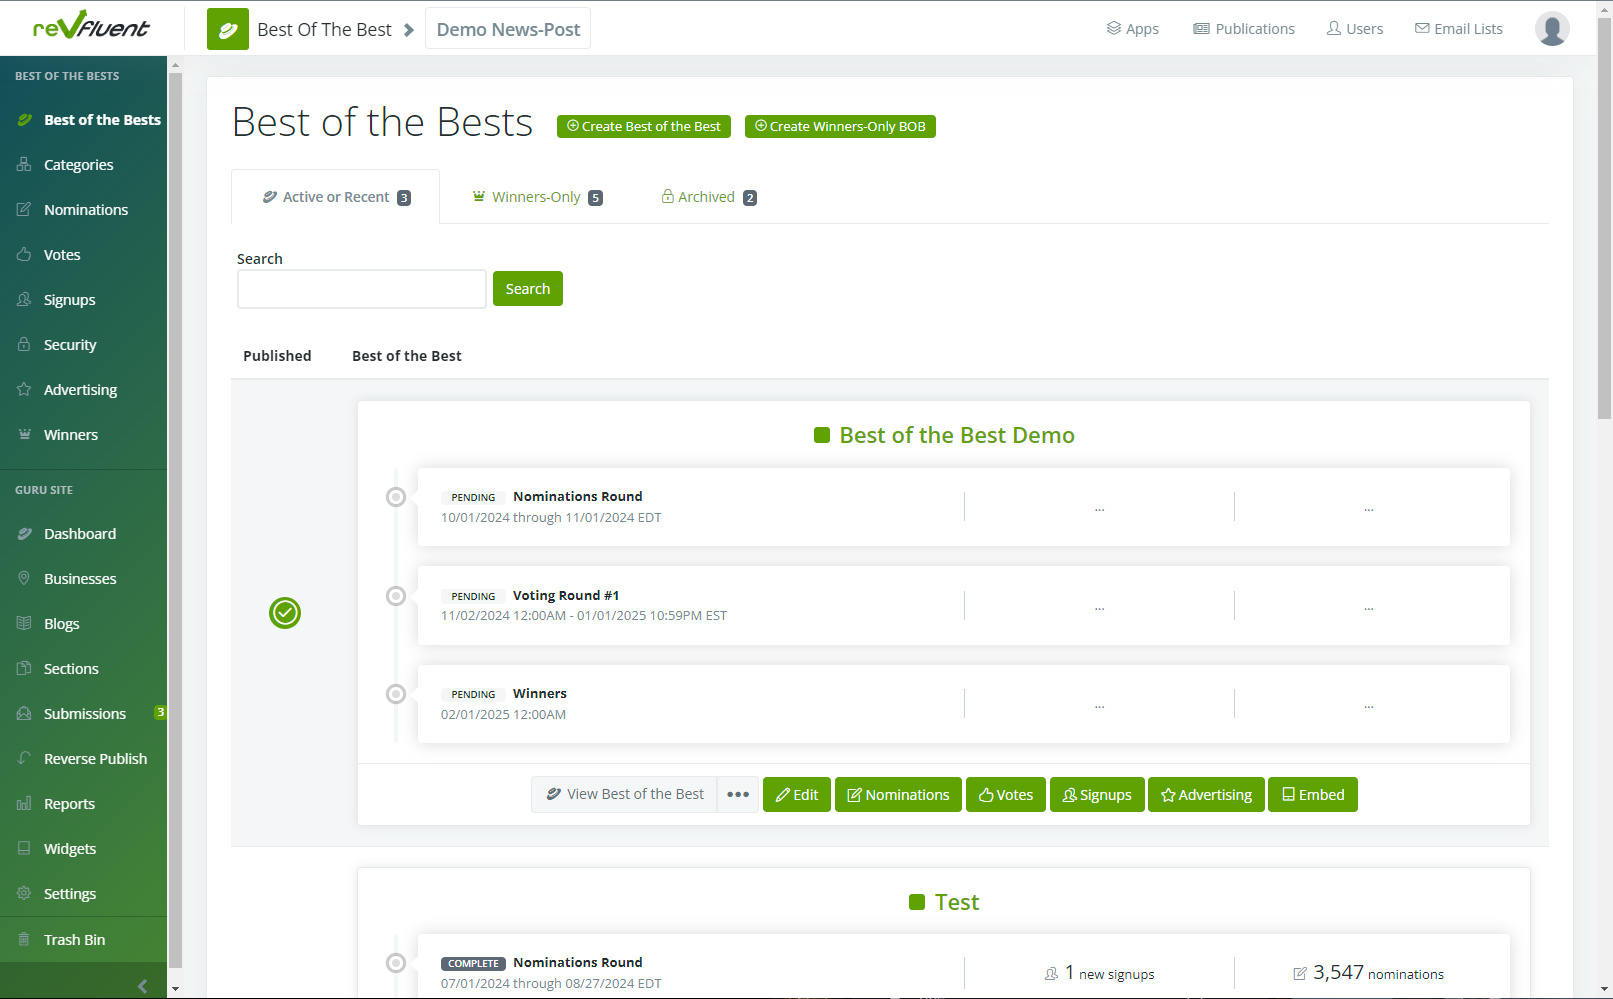
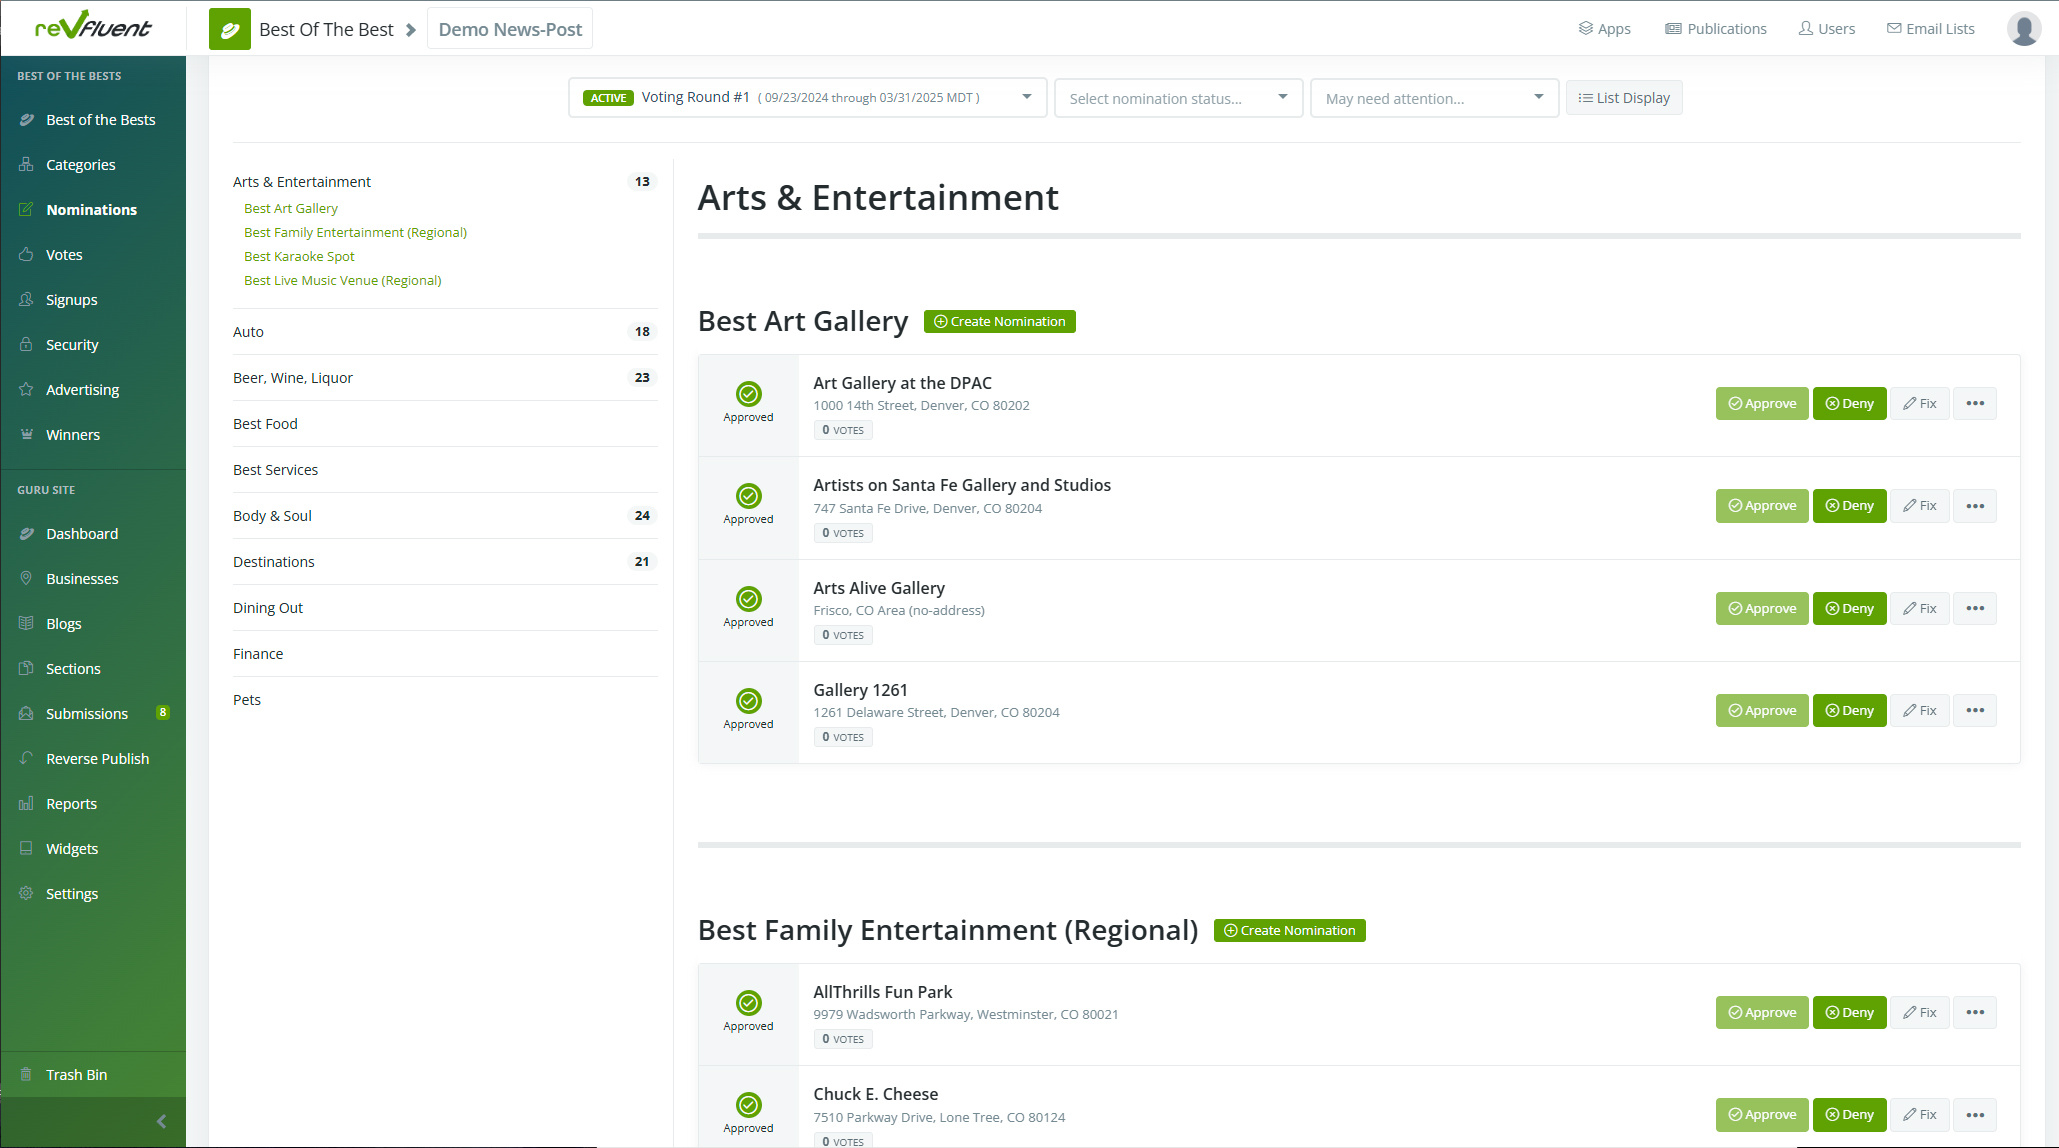
This is your Best of admin site (below) as seen from our demo side. Yours will look the same, with any active or recent contests shown. There are also tabs for Winners-Only and Archived contests.
Along the left rail you'll note shortcuts to various sections of your contests while along the top you'll see a "Create Best of the Best" button. Let's start there.
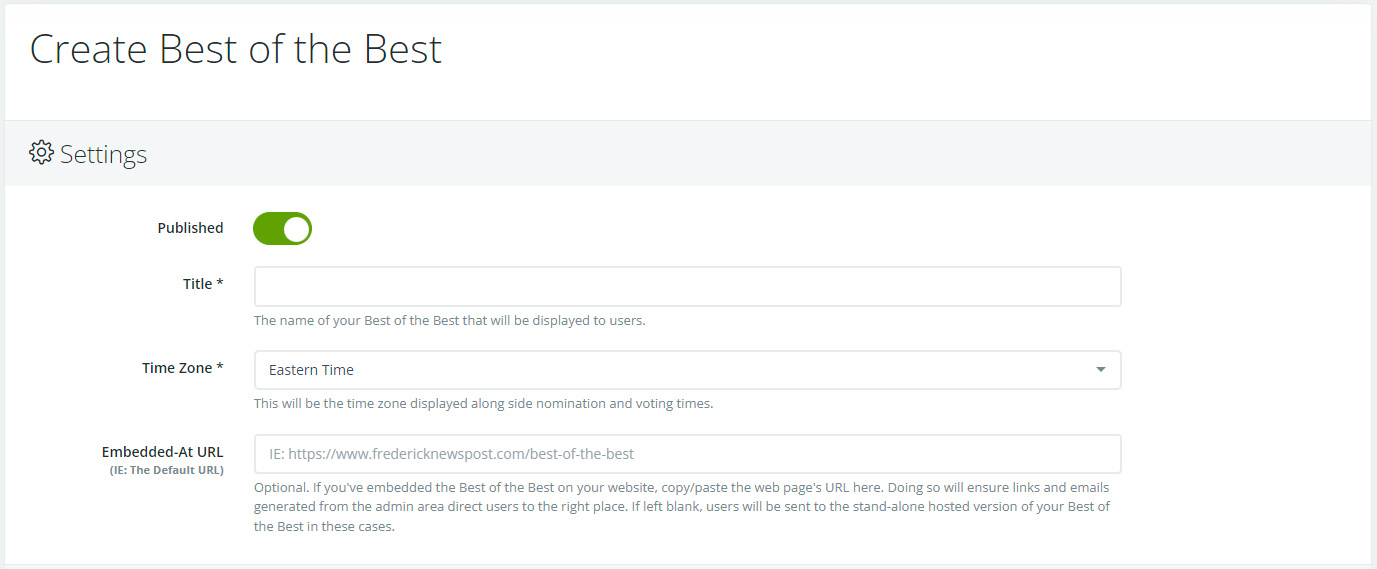
We start off with Settings which includes your Title, Time Zone and the "Embedded-At URL" features.
Embedded-At URL is specific to publications that want to keep their competition entirely internal. We understand this is a preference for those with concerns about page views and related SEO, so we’ve made sure that is an option.
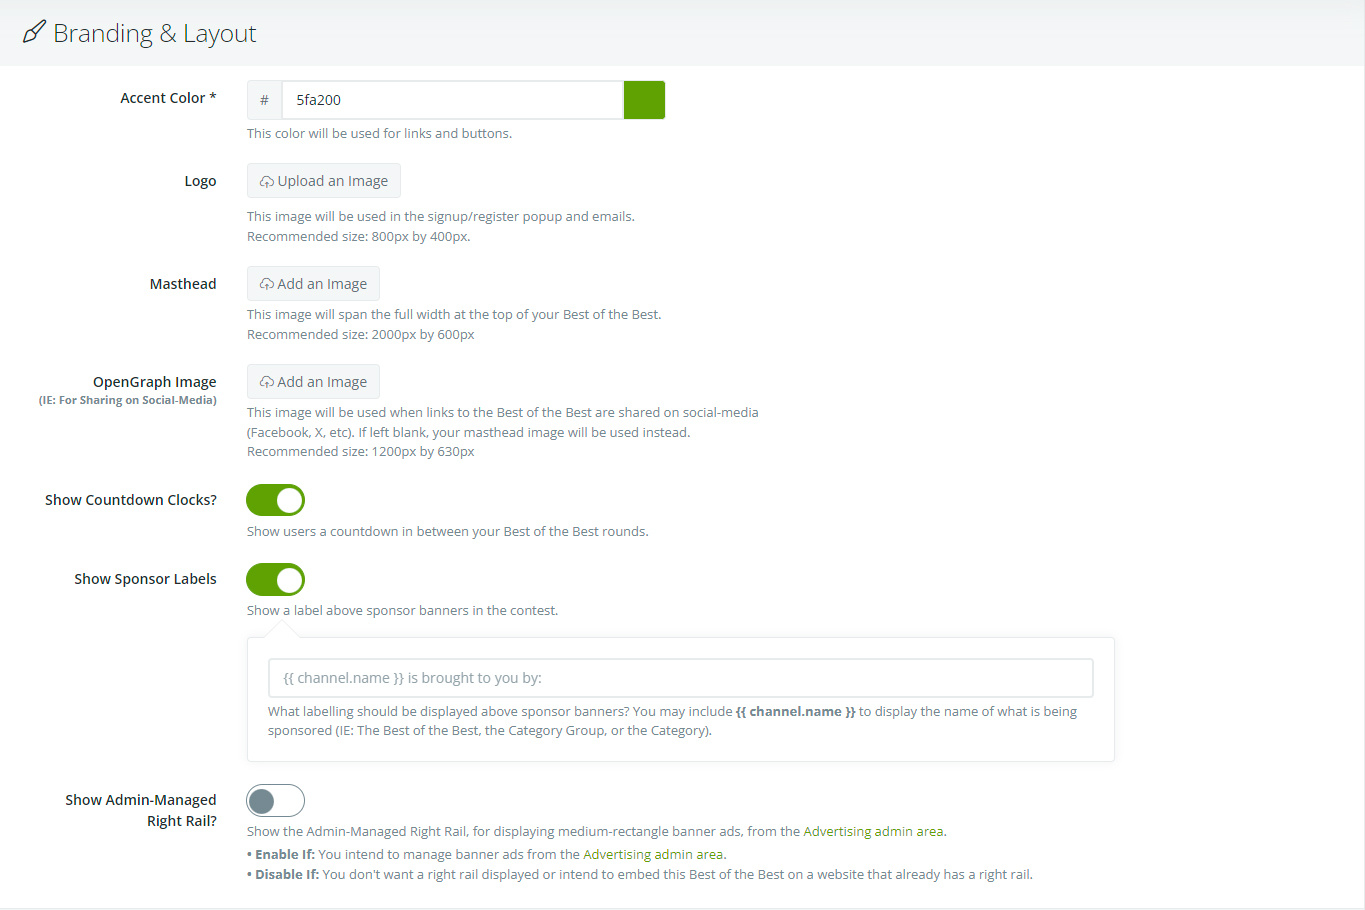
Next we have Branding & Layout, which includes your Accent Color, Logo, Masthead, OpenGraph Image, Countdown Clock, Sponsor Labels and the Admin-Managed Right Rail.
The majority of these options should be self explanatory, but just to dial in on the Right Rail, this is an option for those publications with advertising along their right rail. Enable if you intend to run ads, disable if you have existing ad space, or don't wish to.
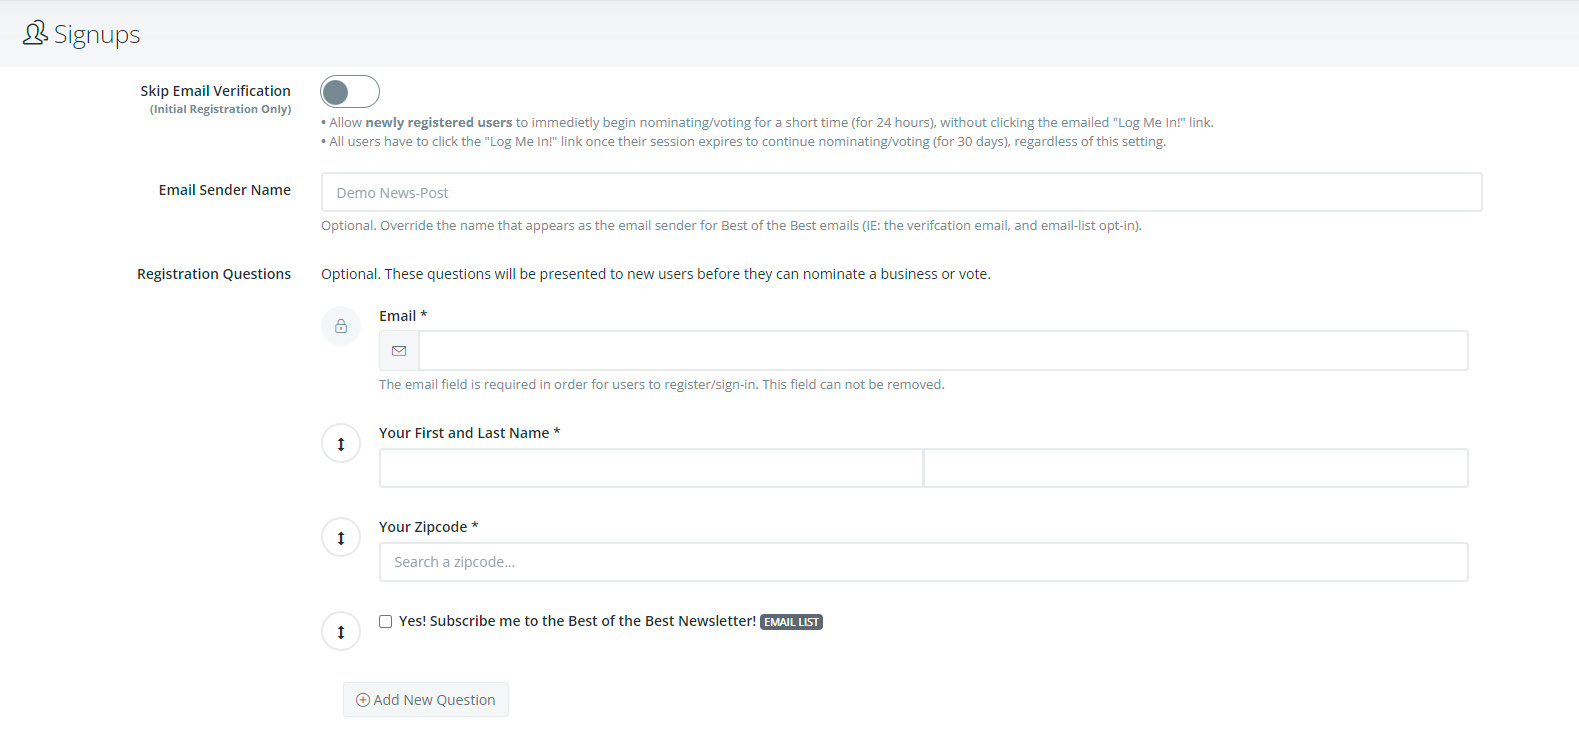
Next we handle Signups, which deals with how your contest accepts voter registration.
First: all voters are required to register in order to vote. You can allow voters a 24-hr grace period to vote without confirming their registration via email, but they will be required to confirm after.
Second: the registration email can have any number of questions added for your benefit, which can also be used for export, data analytics and pre-seeding needs.
A few points to consider when setting up your Nominations!
First: you have a choice between a dedicated nominations round or a combined nomination and voting round. Below we have the dedicated nominations round. Here you setup the Start and End Dates and a Nominations Round Summary.
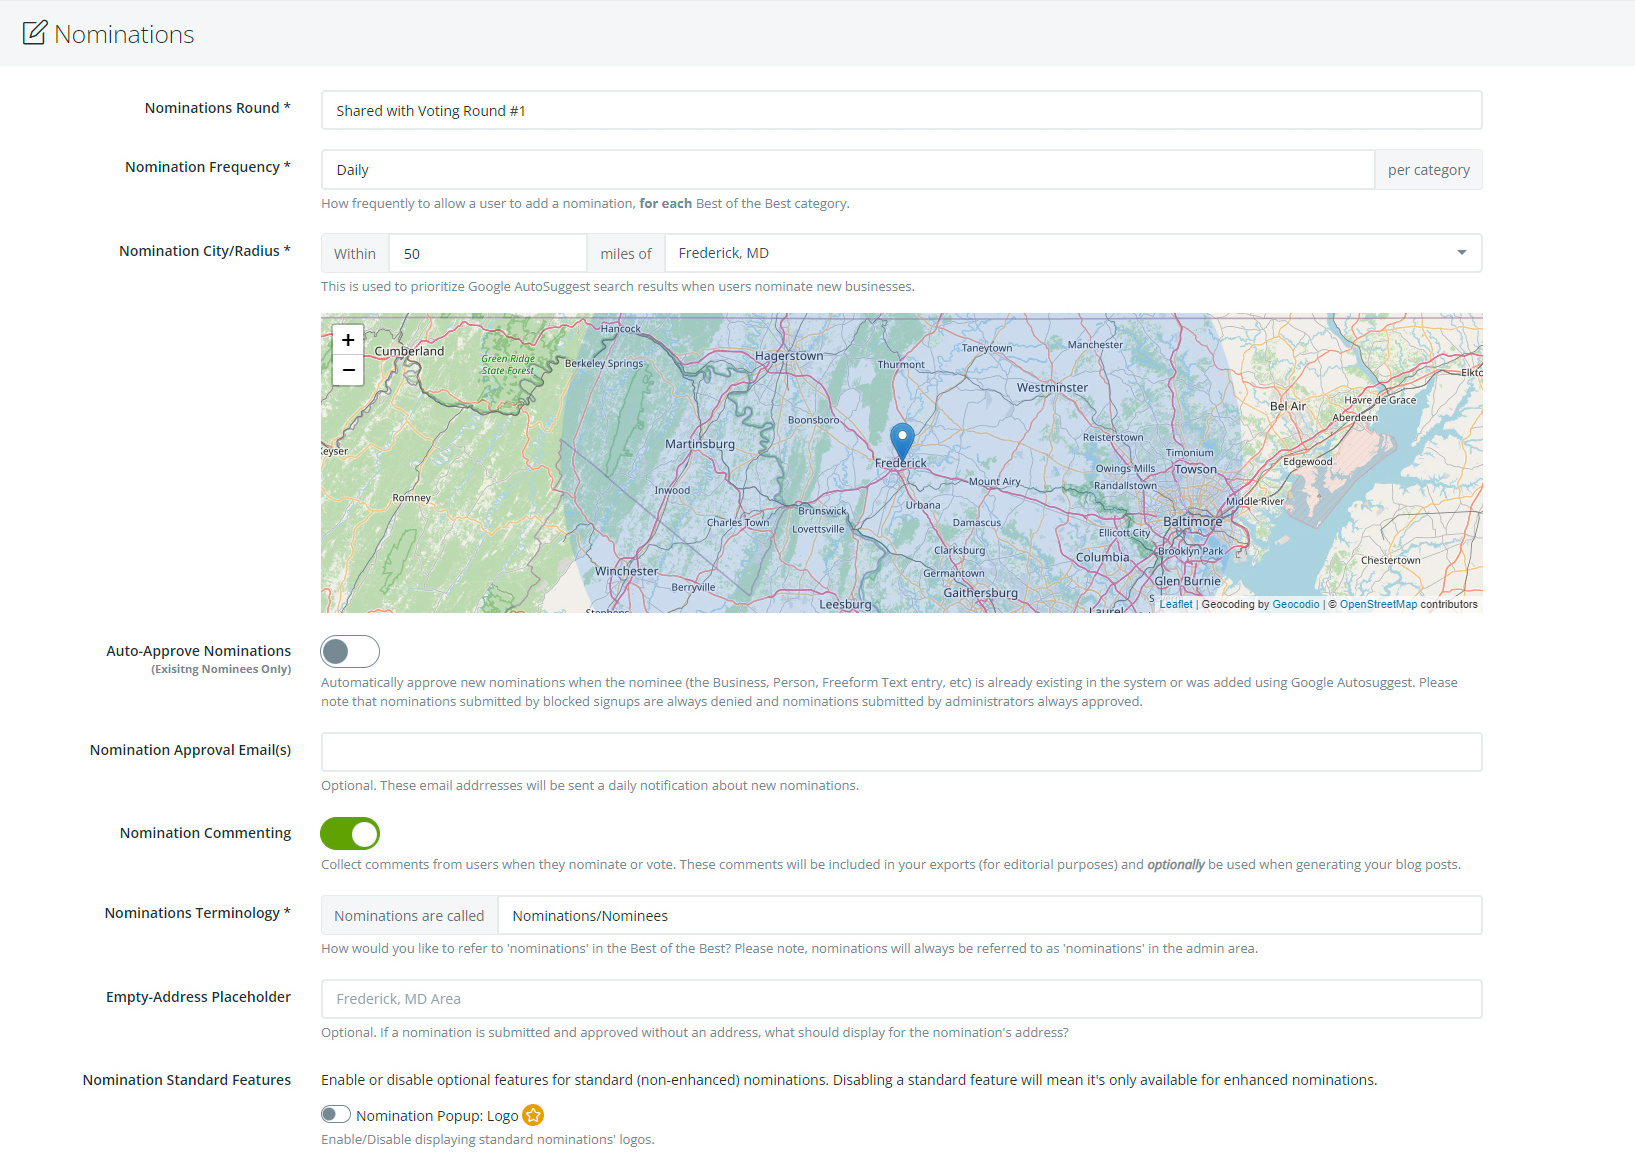
Below is an Combined Nominations & Voting Round. Note, dates are now gone as they'll be handled when setting up Voting Round 1.
Here you set Voting Frequency, Nomination City and Radius, as well house-keeping items such as Nomination Approval Emails for verifying internally, as well as Auto-Approval. This feature allows nominations of existing nominees from within the system.
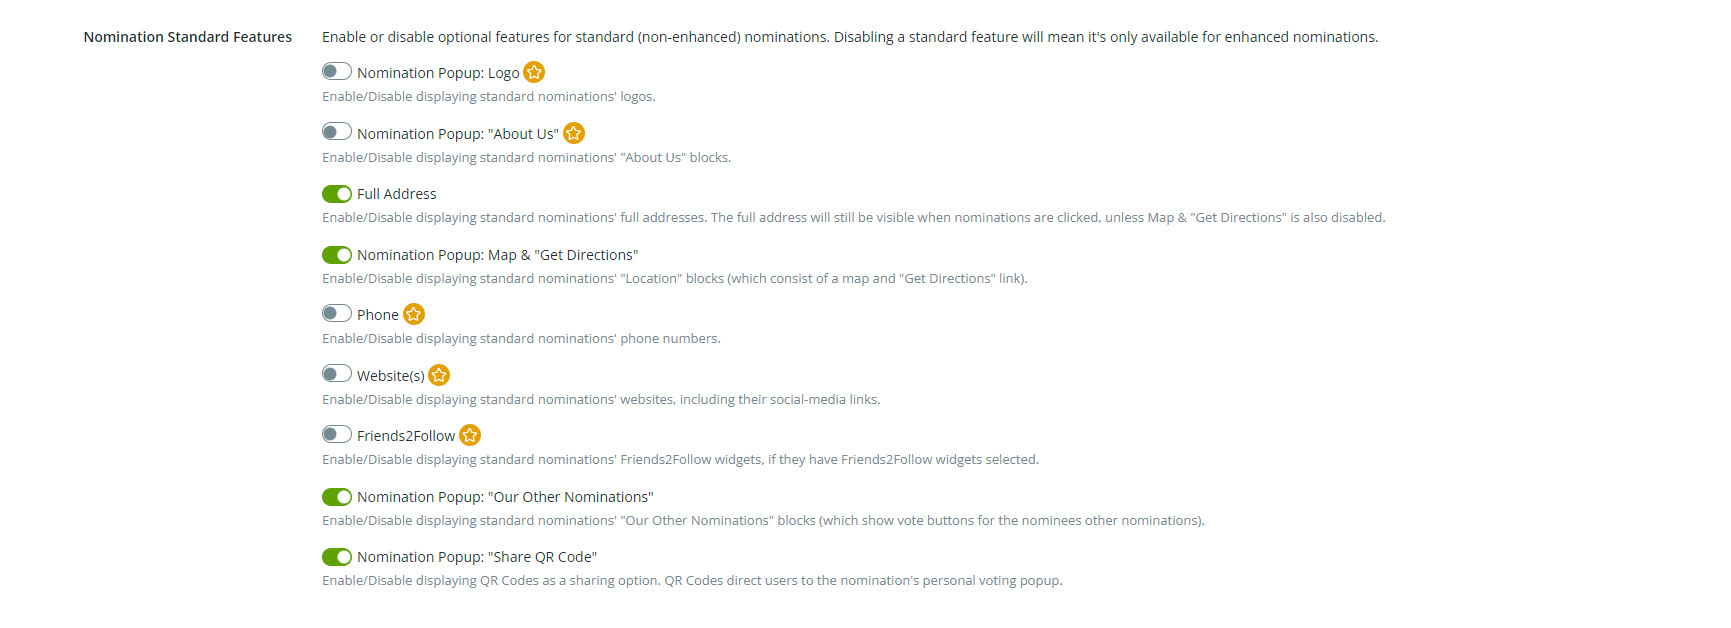
Another key feature of Nominations is their Standard Features. This is a custom section that allows for the creation of Enhanced Nominations, which can be monetized if you wish.
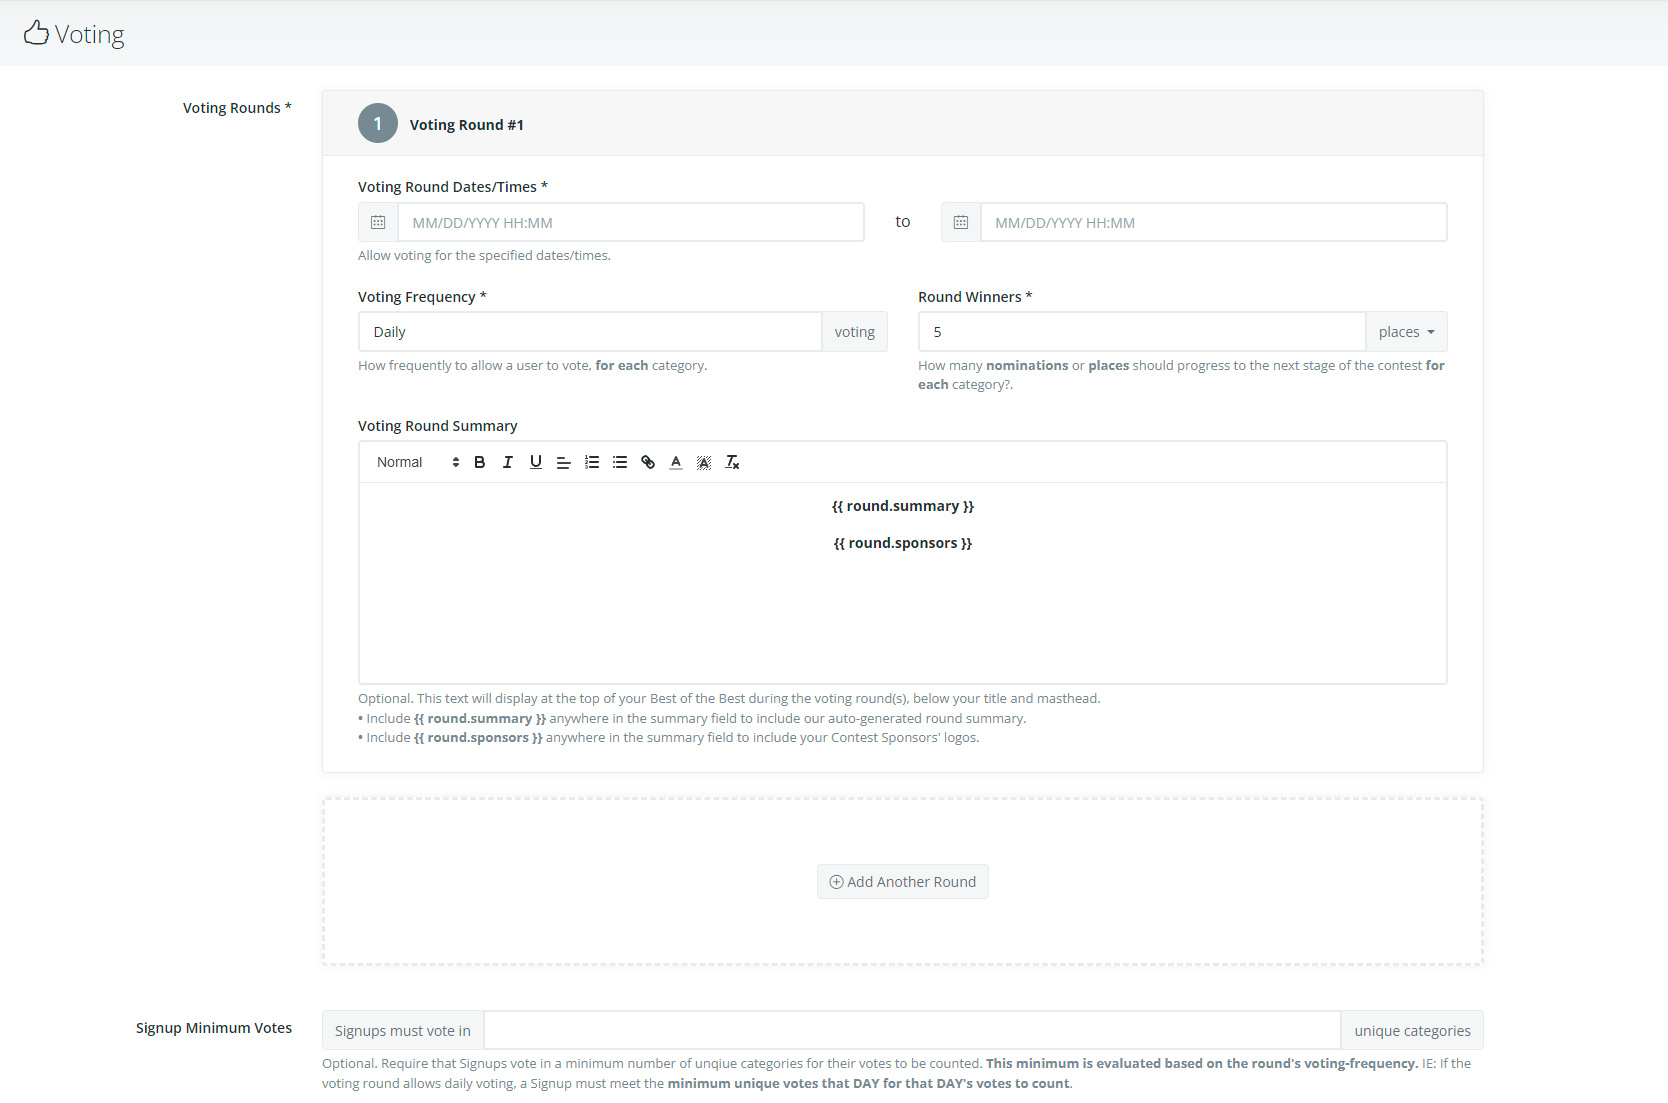
With Nominations handled, we shift to Voting.
You can set up as many rounds as you'd like, each with their own Start and End Dates, Voting Frequency, Number of Round Winners and Summary. We also include the option to require a minimum number of votes per category.
With Voting sorted, we move on to setting up your Winners.
You'll want to set your Date, add a Summary (or use ours), handle Tie-Breaks and Naming Conventions for the winners.
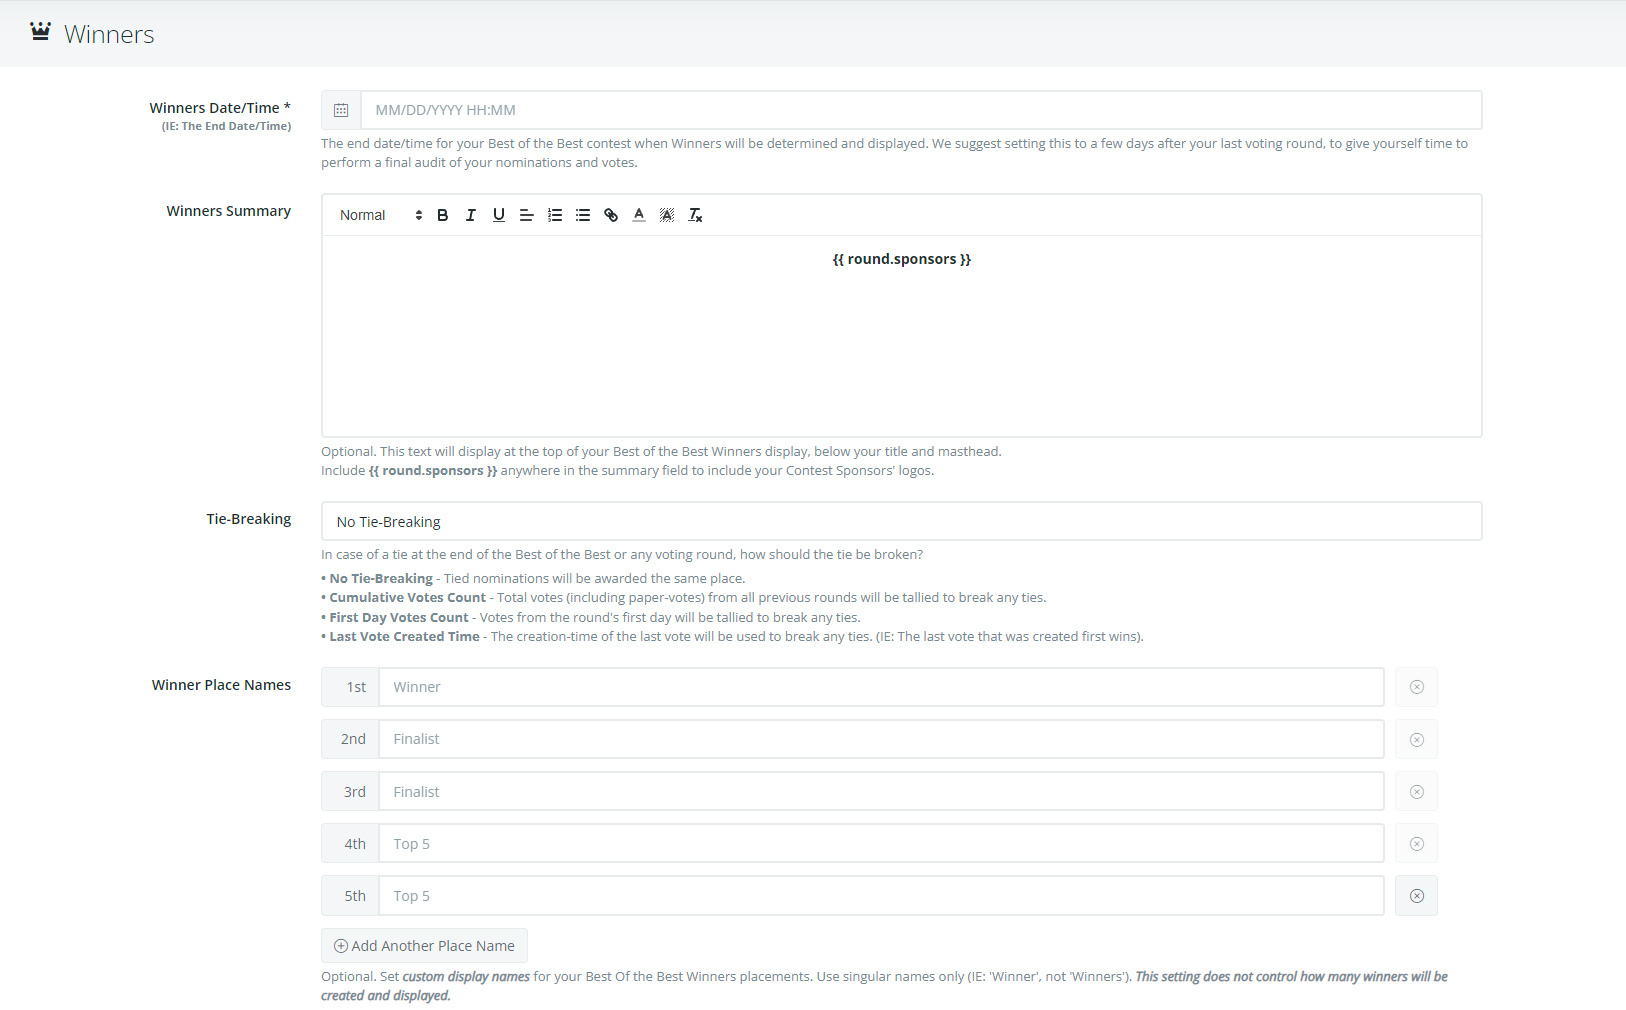
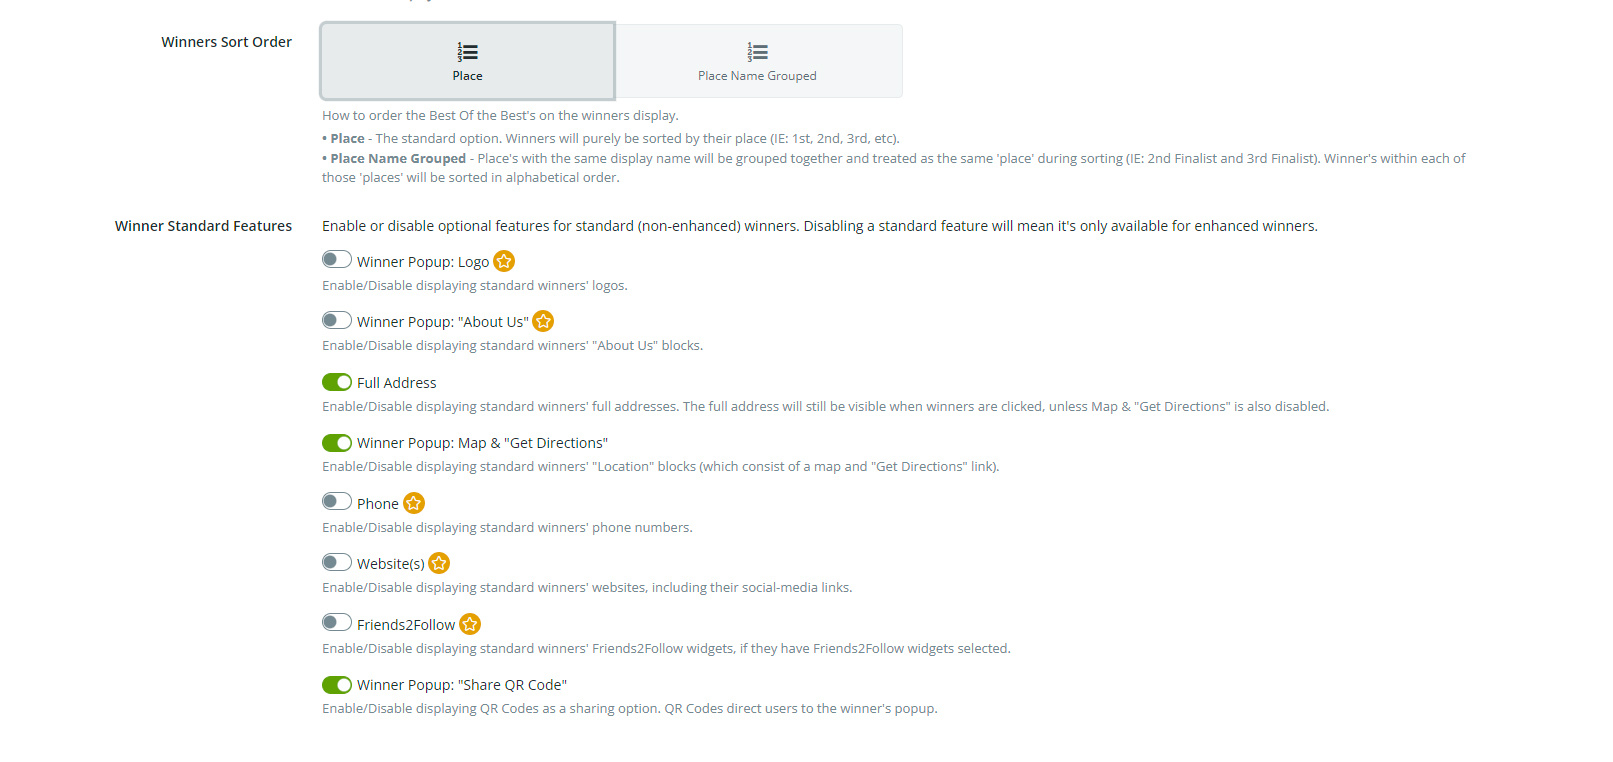
And just like Nominations, we offer enhanced winners depending on how you feel like monetizing your contest. Please note, winner sorting can also be handled here.
With that handled, we finish with Support and Rules. These two sections provide users the ability to provide feedback (Support & Feedback) and the legal requirements for running your contest (Rules & Legal).
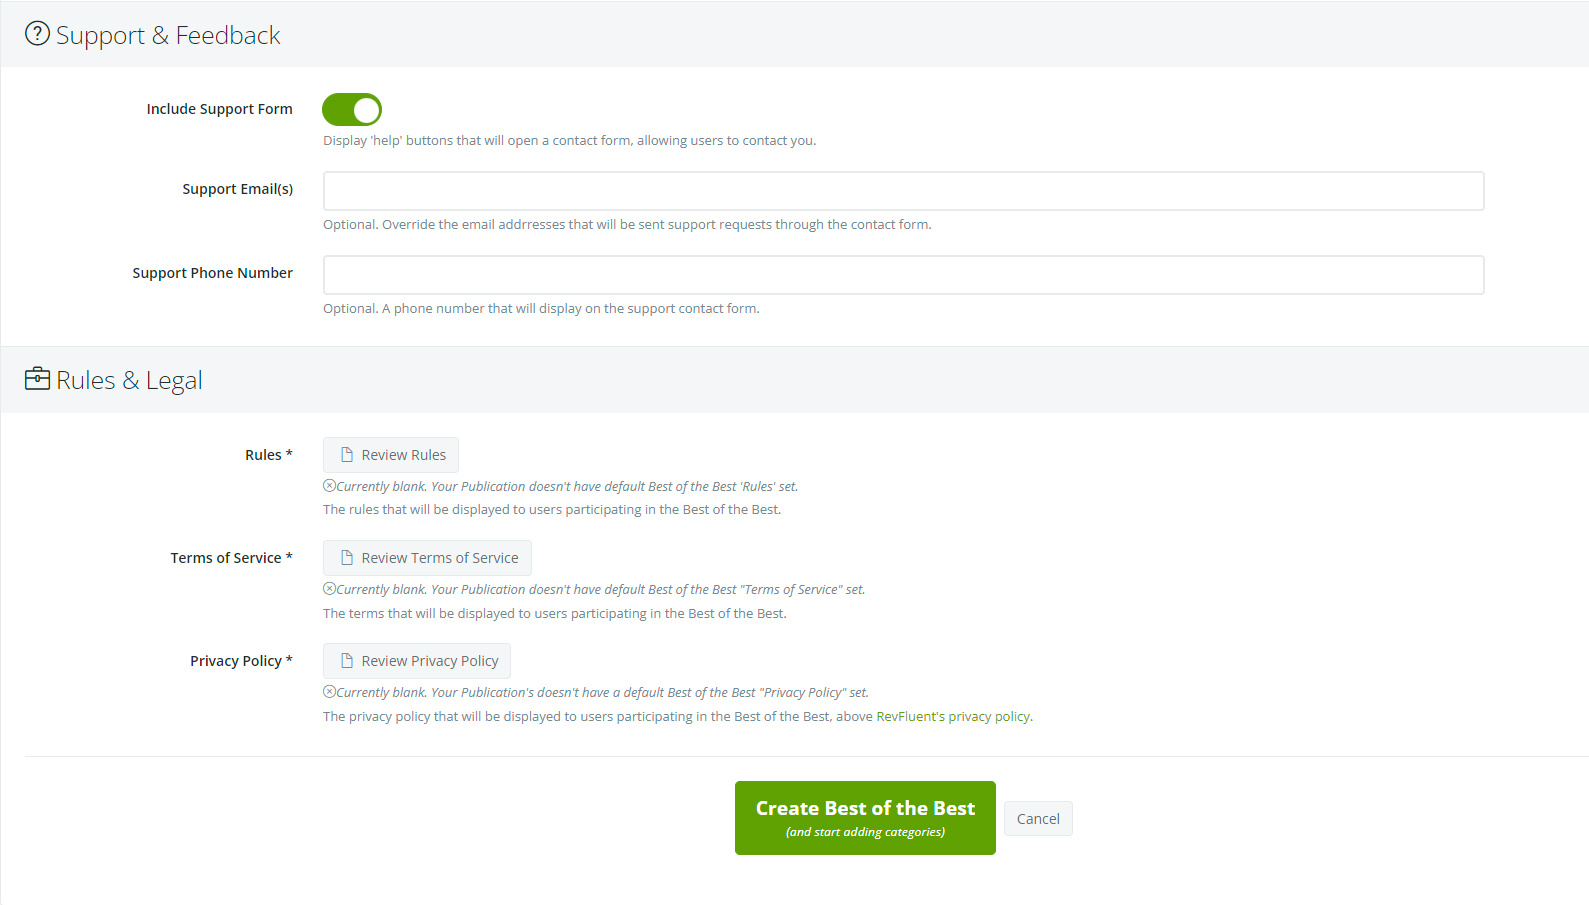
With that, your contest is ready to be published and we're one step closer to having your first contest! Next we'll cover setting up your Categories and Categories Groups.
If this wasn't helpful, click this link to submit a support ticket.